Materials:
- 1 picture frame (whatever size you want)
- hot glue gun
- fabric scrap 1/2" larger than the size of your picture frame
- hammer and nail to hang frame
This literally took me all of about 10 minutes!!! That's how easy it is! Yesterday while the kids and I were out running errands, we stopped by the Salvation Army Store. I picked up this picture frame for $3.
Mkae sure the frame you choose has a glass front and some kind of hook so you can hang it on the wall. Mine even has those little metal tabby things (don't know what they are called) that make it super-duper easy to remove the back to change the picture.
I found some fabric that I liked in my "stash". I found it in the remnant bin at Joann's. I LOVE that store! Make sure you choose something with a light enough print that you will be able to see your writing!
I used that cardboard filler piece from the picture frame to measure my fabric. I cut my fabric about 1/2" larger than the cardboard piece. If your fabric is like mine, make sure you iron it befor the next step!
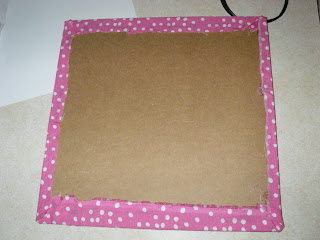
Heat up your glue gun and get glueing! I started with glueing the corners first so that the corners would end up nice a crisp on the other side. Make sure you place the cardboard on the wrong side of the fabric... this way the right side will be seen! :)
After glueing all four corners, I glued the long side pieces down. I didn't need much glue, just enough to hold it down. Make sure that the front of your fabric (the piece that is under the cardboard) is nice and smooth when you do this step!
Voila!
The view from the front!
Then, stick your fabric covered cardboard in the picture frame and put the backing on.
Finished product!
If you want to keep your dry erase marker close at hand, get some of those velcro sticky back circles. and put one on the side of the frame and the other on your marker. Then you can have your marker attached to the frame for easy use!
I hung mine in my little crafting corner.
Happy crafting!


